
What is Synapse Network
The Synapse Network is a new-era financial institution created by combining the best aspects of mainstream finance, with the best features that blockchain technology can bring to the table. To get know more about Synapse Network, visit our website: click here

How to start your adventure with Synapse Network
To use our platform, you need to install a cryptocurrency wallet such as Metamask on your browser or smartphone.
How to do it:
We will describe this process using the example of the Chrome browser to find an extension for this browser:click here and then search for the extension by typing “MetaMask” in the search box. Also make sure you are using the correct source – it should be from https://metamask.io Then click the “Add to Chrome” button to add the extension.

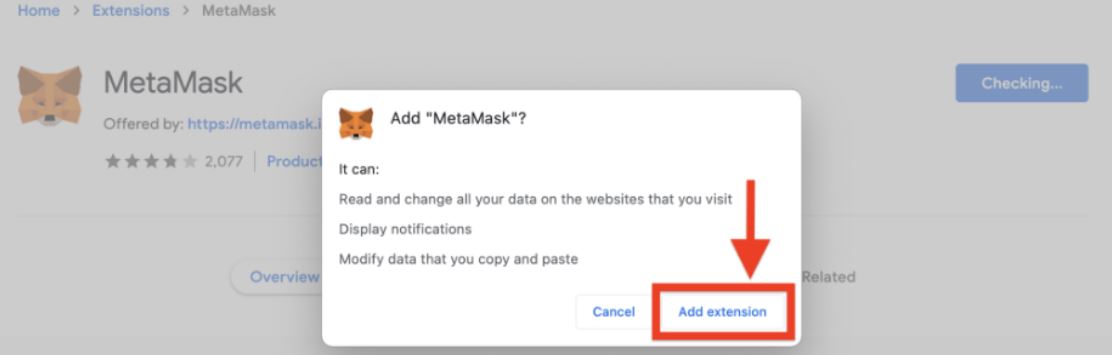
Then confirm that you want to install Metamask by clicking the “Add extension” button
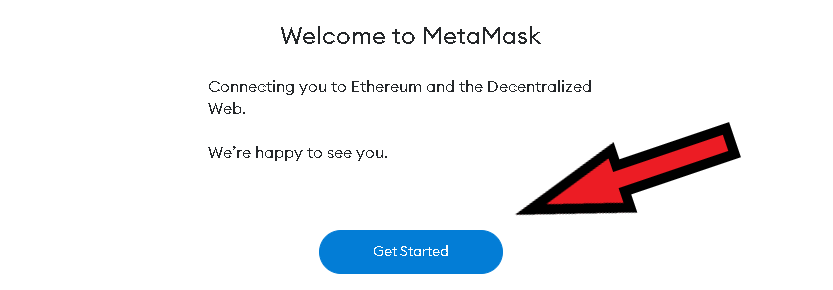
The browser will now install the extension, your task is to click the “Get Started” button
Be sure to add the Metamask extension to your browser bar by clicking the puzzle icon and then the pin icon.
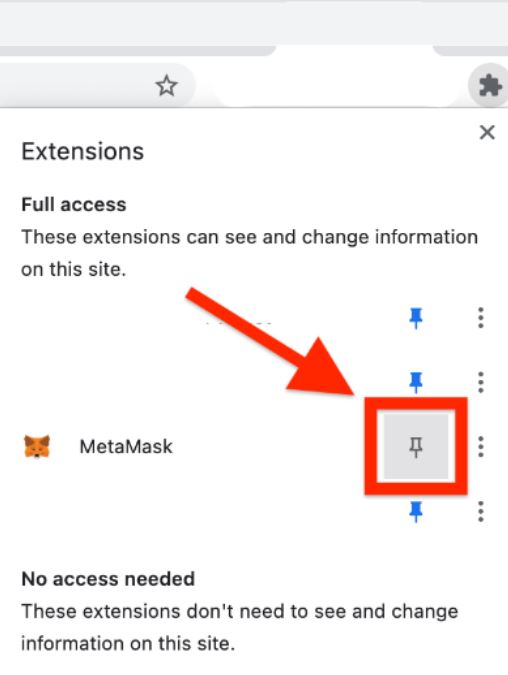
This will give you easy access to your Metamask wallet, if you need to log in, change networks or do anything else, just click the icon to bring up metamask.

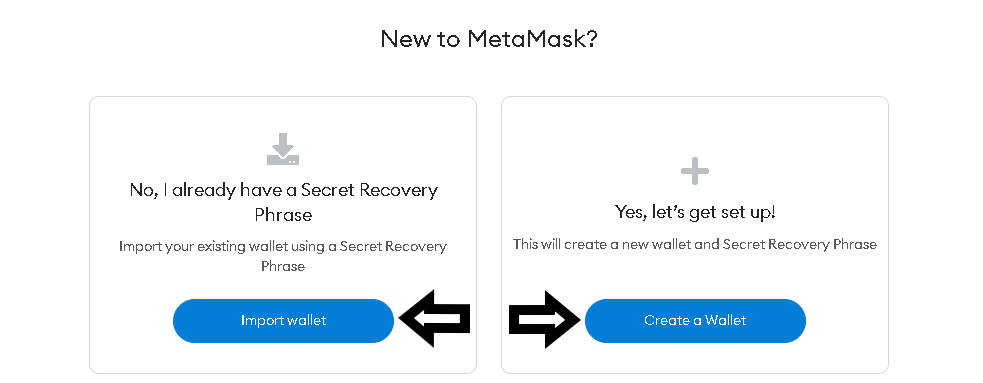
Once the extension is installed, there are two options, the first is to click the “Create Wallet” button if you don’t already have a Metamask account, which will start the account creation process, or the second is to “Import Wallet” if you already have an account.
Creating a metamask account:
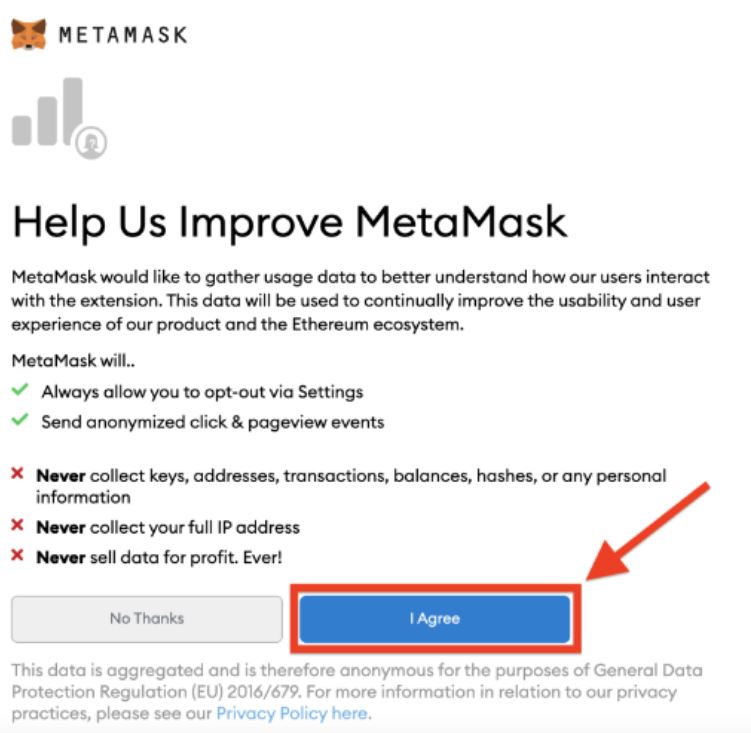
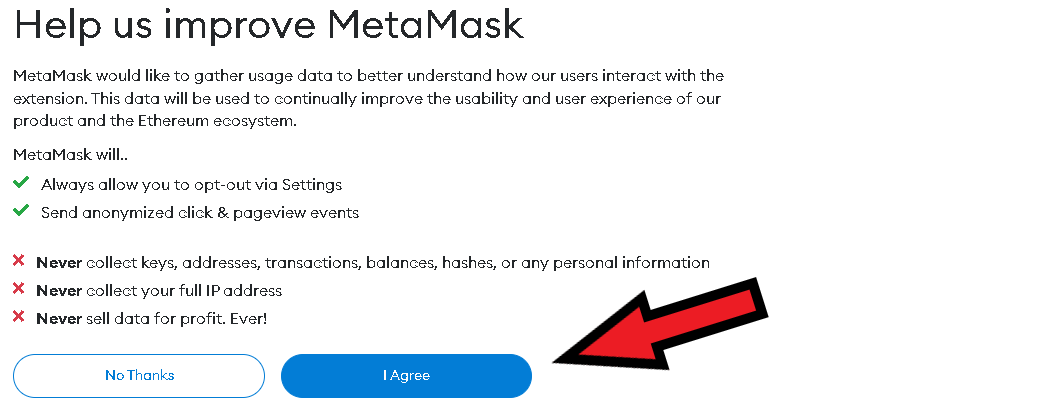
To create a new account, press the “Create Wallet” button. After doing this, read the information displayed on the screen and then press the “I Agree” button
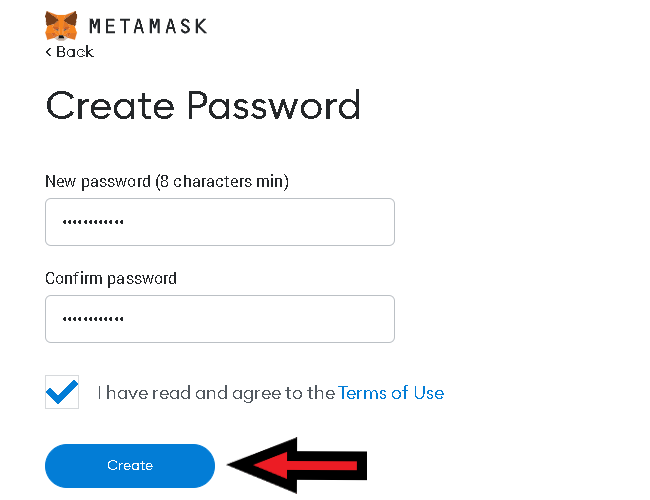
Now create a password for your Metamask account. Then read and confirm Metamask’s terms of service and click “Create”.
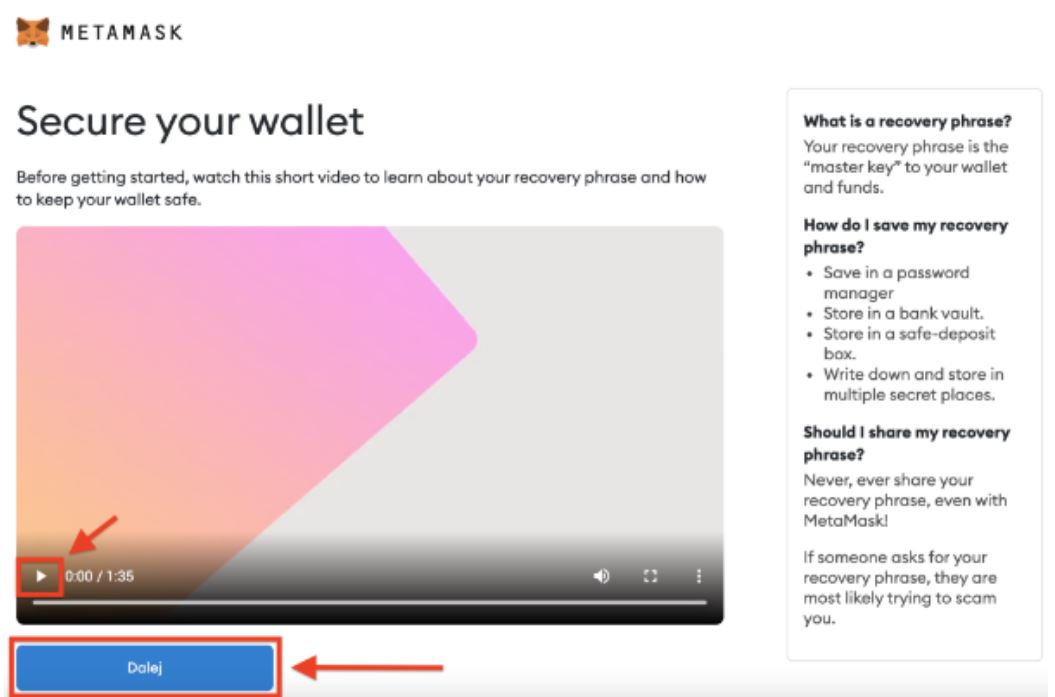
It is now recommended to watch a short video on the security of your data. Read all the information displayed on the screen, after completing these steps, press the “Next” button
At this point, click on the lock to see your secret backup phrase (so-called “SEED”).

ATTENTION! – this is a very important moment.
You now see the “secret backup phrase (seed)” – 12 words related to securing the MetaMask wallet, these are words that will enable you to recover funds in the event of possible theft or loss of your phone/computer, or when you change/reinstall the system or device.
NOW SAVE THE PHRASE “SEED” VISIBLE AND DO NOT SHARE IT WITH ANYONE. DO NOT STORE THESE 12 WORDS ON YOUR COMPUTER OR PHONE – DEVICES THAT ARE CONNECTED TO THE INTERNET.
IT IS IMPORTANT TO WRITE THE WORDS IN THE CORRECT ORDER. PLEASE MAKE SURE YOU DO NOT MAKE ANY MISTAKES! YOU CAN WRITE THEM ON AN ORDINARY SHEET OF PAPER. BEST IN SEVERAL COPIES AND KEEP THEM IN SEVERAL PLACES AT THE SAME TIME. IN SUCH PLACES WHERE NONE OF THE THIRD PARTIES WILL HAVE ACCESS TO THEM.
If you have already secured your secret backup phrase, you can now click the “Next” button.

Now put your secret phrase in the correct order by clicking on the words below.
After completing the task, click the “Confirm” button.
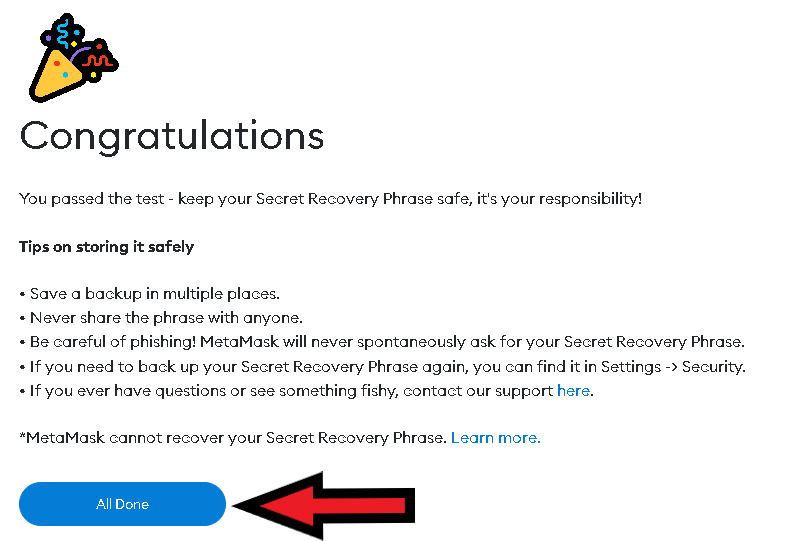
At the end of this part of the guide, click the “All done” button.
Importing a metamask account:
After clicking “Import wallet” press “I Agree”
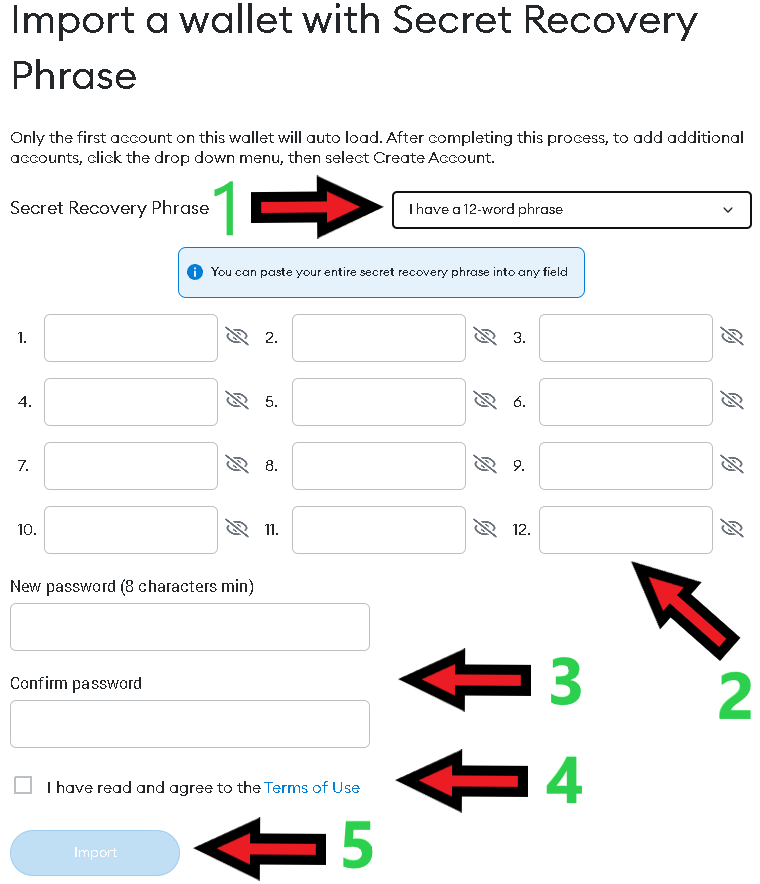
The first step is to make sure that you have selected the correct number of words to import. Metamask has twelve seed words, so set this number. If you are importing another wallet, you can change this value. The second step is to enter the seed words, then set your password and read and confirm the terms and conditions. Finally, click “Import”.
After completing these steps you will have successfully imported your metamask wallet. Click “All Done” to confirm.
How to do it on smartphone:
Depending on the system of your smartphone, you can find the Metamask application in the App store (click here) or Google Play (click here). Once you have downloaded and installed the app, create or import an account in the same way as shown above.
How to create an account on the Synapse Network.
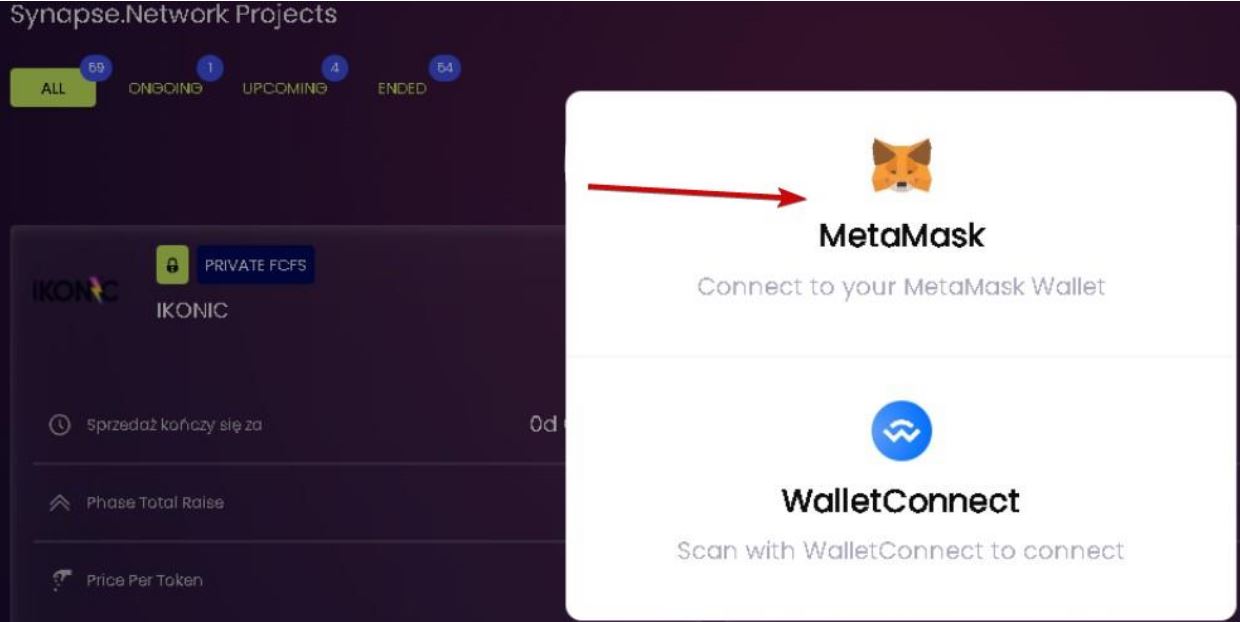
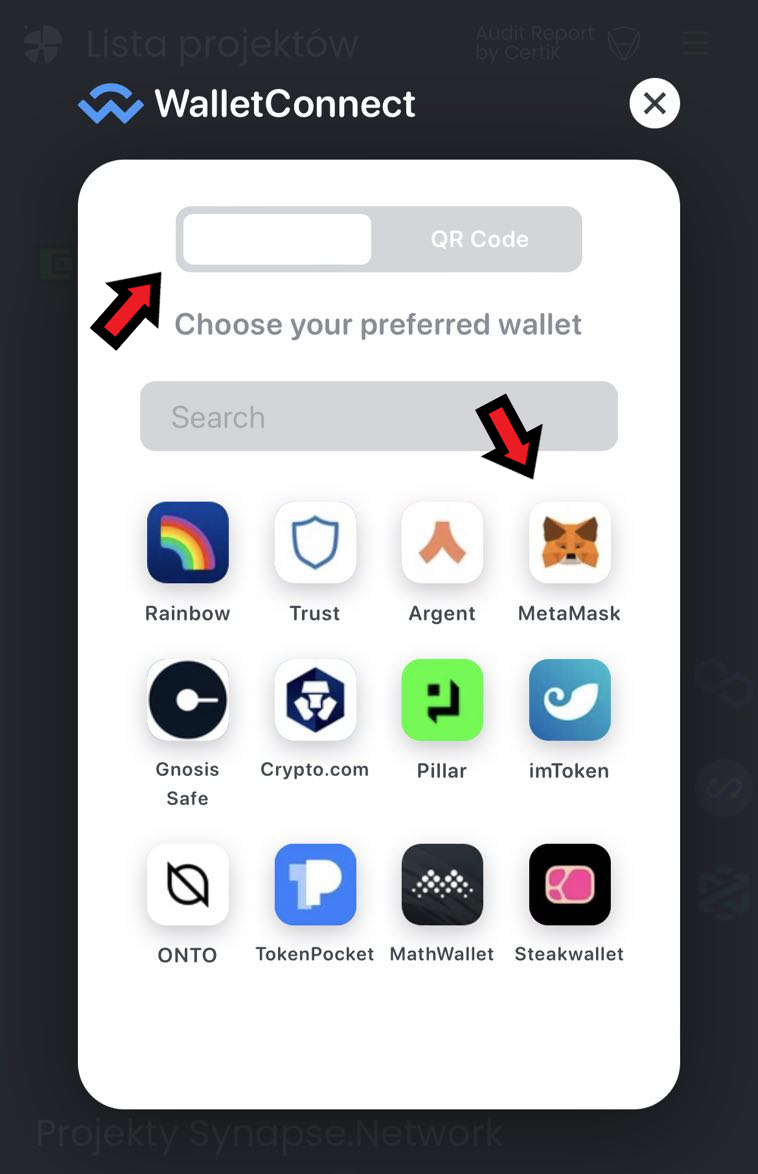
After creating your Metamask account, you need to create an account on our platform, click here. There will be two options to choose from “Metamask” and “WalletConnect”, click “Metamask”.
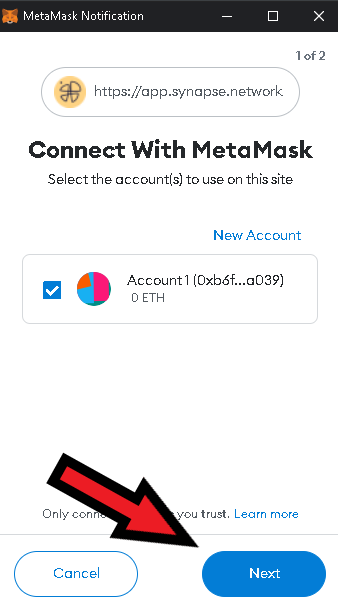
To connect with Metamask click “Next”
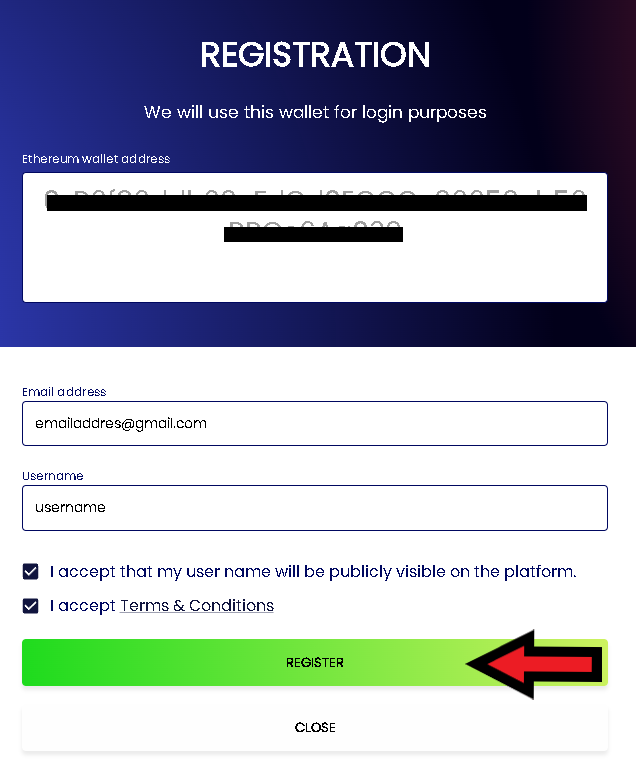
After clicking the “Connect” button, you will connect to the platform. You will now be able to create an account on the Synapse Network platform. Press “Register”
The next step is to check if the Metamask wallet address is correct, remember that you must use the same address also when performing KYC, KYC is an identity verification procedure. You also need to provide your email address and set a username. When performing KYC, use the same email address that you use here. Accept the required consents and click “Register”.
After entering the required data and clicking the “Register” button, click “Sign”

Congratulations, you have just created an account on the Synapse Network platform. If you need to log in again, click “Log in” and confirm with a Metamask.
How to log in and connect to the Synapse Network platform on a smartphone:
Make sure you have installed Metamask using the App store (click here) or Google Play (click here). Once you have installed the app and created or imported your Metamask account, launch Metamask. You will see a window to select different applications, click on the “Mobile” bar in the upper left corner and then click on the Metamask icon.
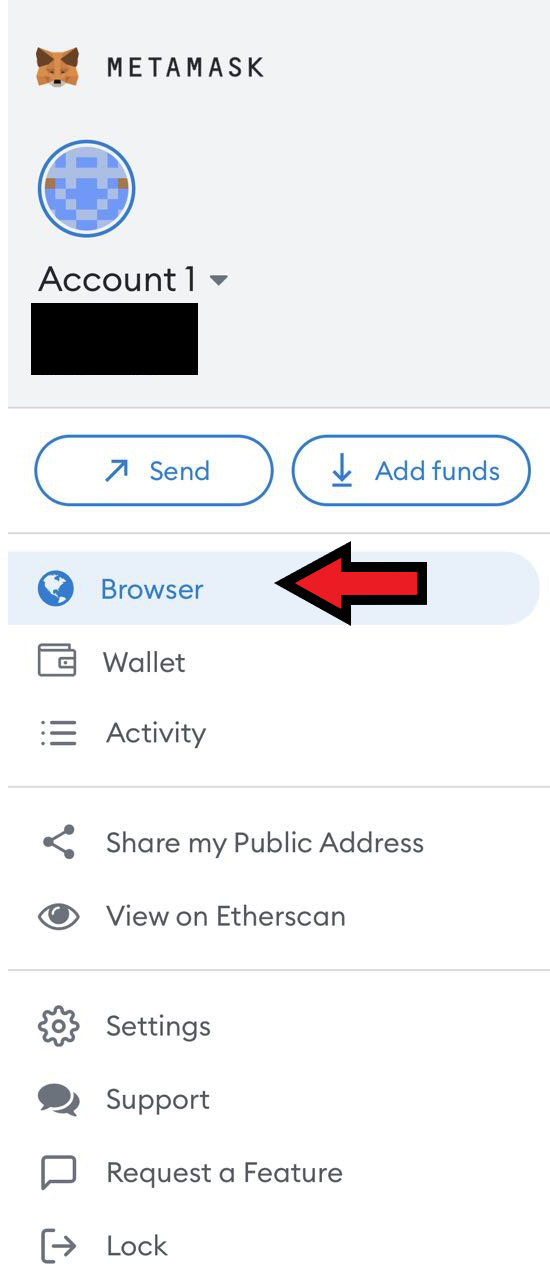
Once you are in the Metamask, click the button in the upper left corner that will expand further options.

Then select “browser” to launch the built-in Metamask browser.
Use the search engine and provide the address of our platform https://app.synapse.network/

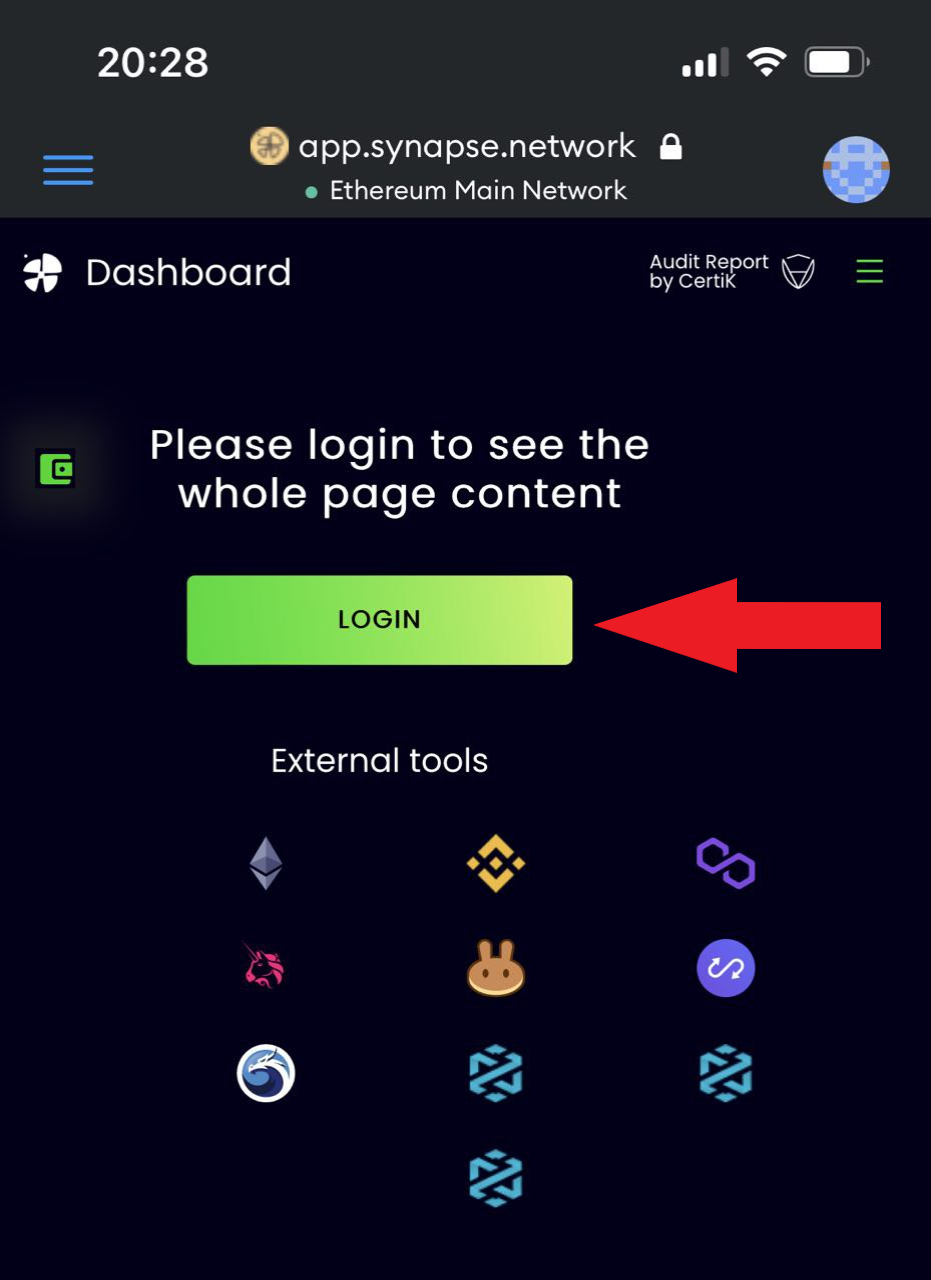
After entering your address, you will go to the Synapse Network platform. To log in click on “login”
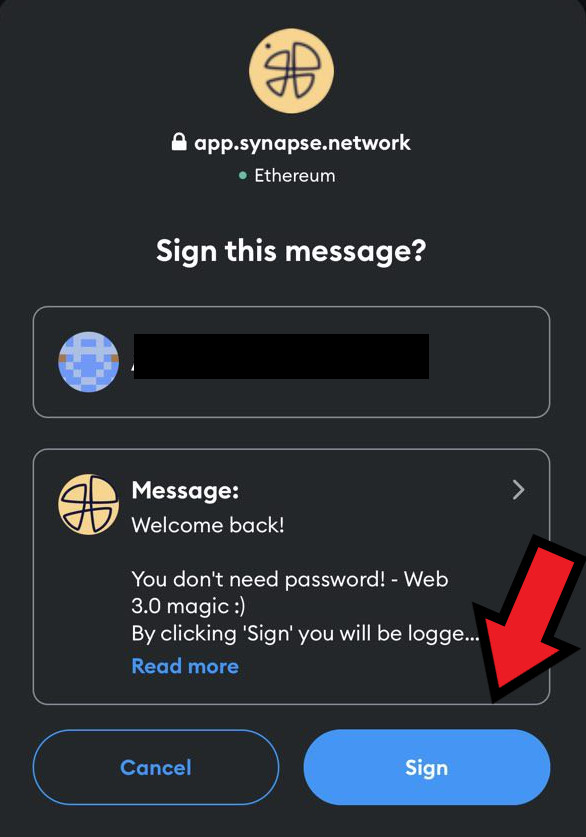
After clicking on “login” you must confirm your wish to log in with metamask, to do this click on “sign”
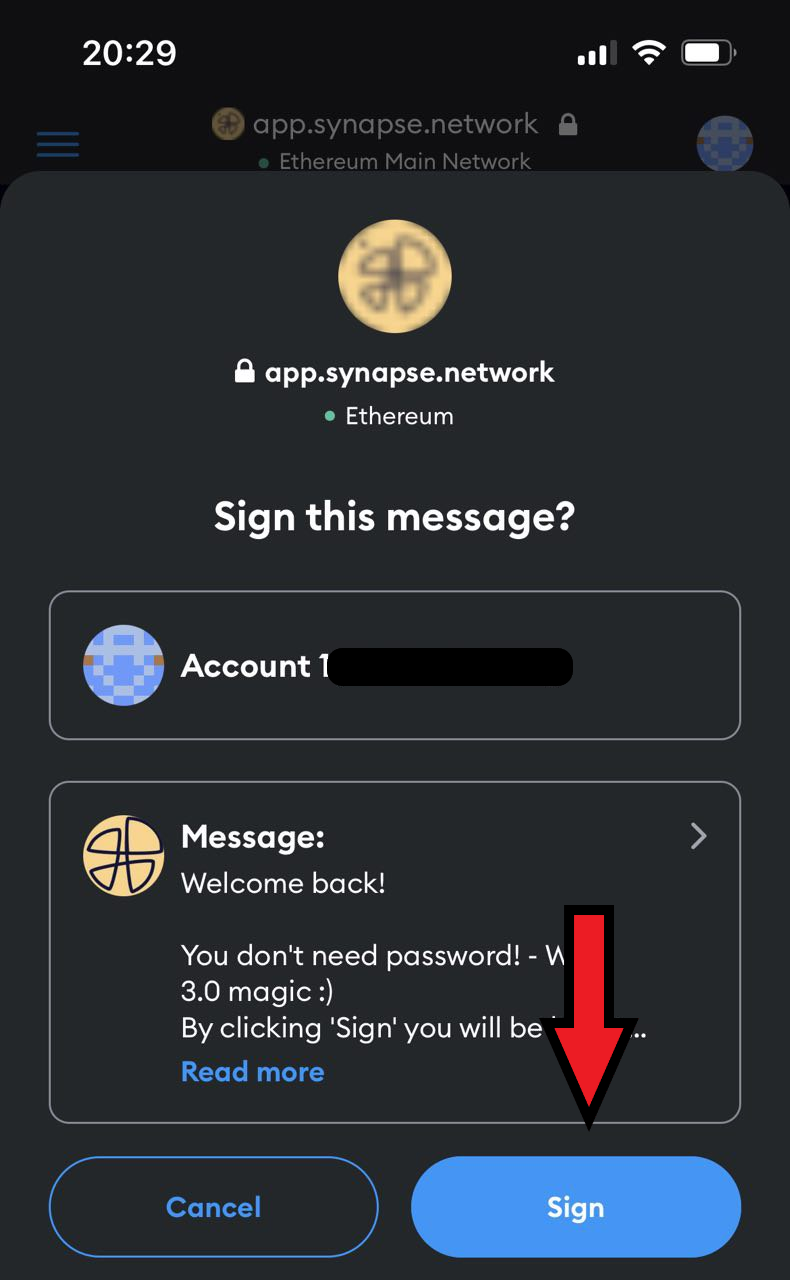
Congratulations, you have just logged on to the platform.
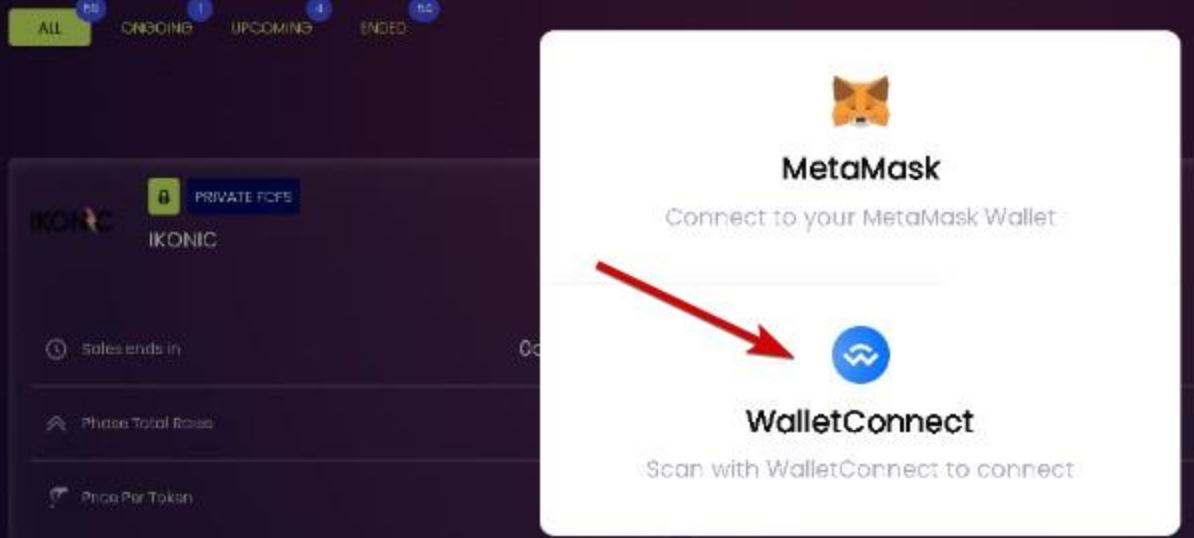
How to connect with the platform by WalletConnect
To connect the Metamask app on your mobile phone to a browser on your desktop, use the ‘WalletConnect’ option.
Then, on the left, click on “QR code” – a QR code will appear, which must be scanned with the Metamask device.
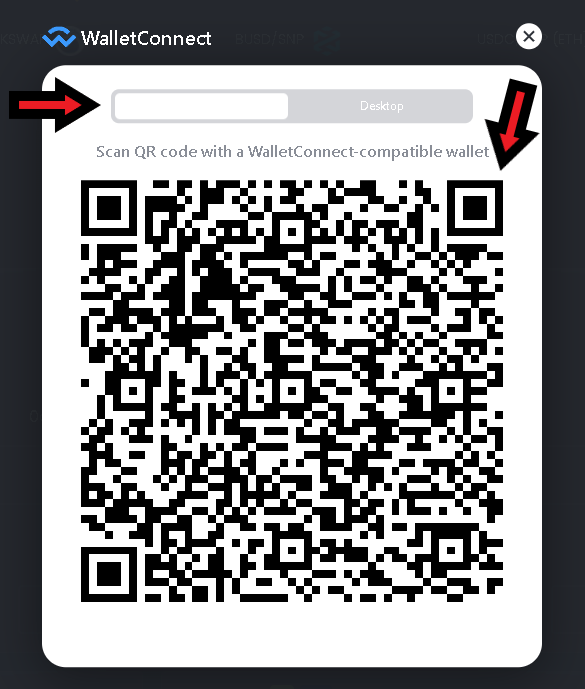
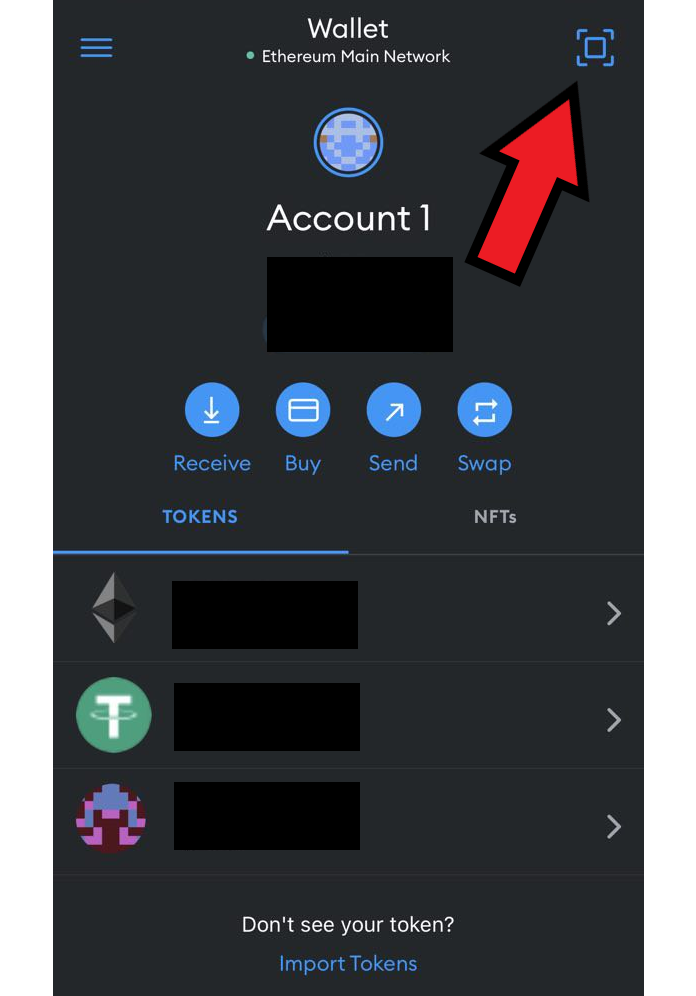
To scan a QR code, launch Metamask and click the icon in the upper right corner.
After scanning the code, you must click “connect” and then “sign”
Congratulations, you have logged in using WalletConnect.

The Synapse Network platform a brief description
A brief description of how to navigate on the platform.
Dashboard
Here you will find all upcoming, ongoing, completed and future sales rounds on our launchpad. You can sort the displayed projects as you wish using the buttons in the upper left corner. You can also use the search engine to find a project by entering its name in the “search” field. Below the search engine, you can also change the way your projects are displayed using the available layouts.
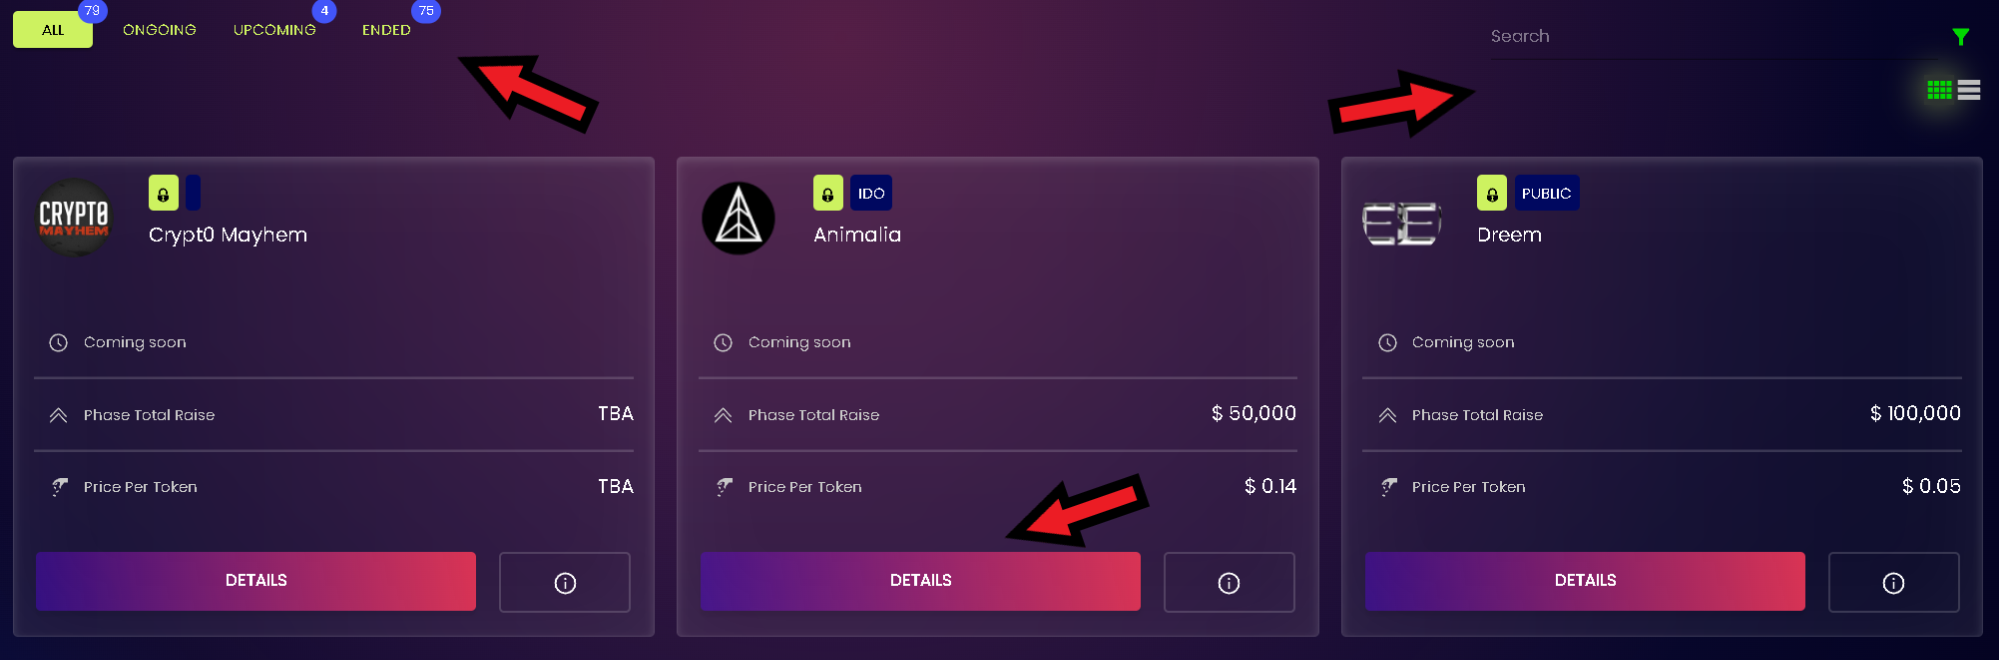
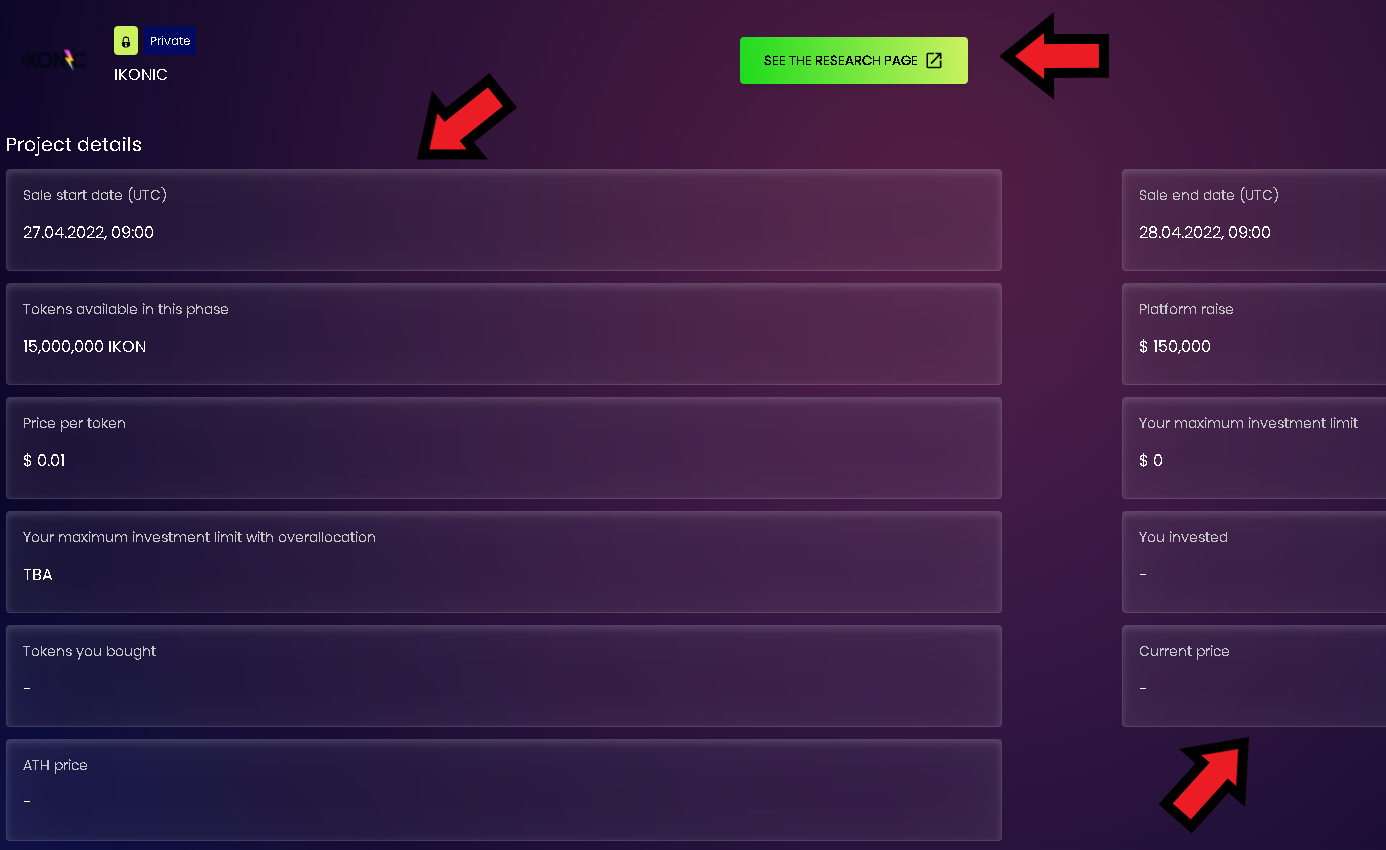
Clicking the “Details” button will take you to the tab related to a given project. This tab includes, among others: details such as start and end date, price per token, total investment amount, time until the sales round starts or ends, total guaranteed allocation amount, number of tokens purchased, and the “Research Page” highlighted in green. The “Research page” contains more detailed information about projects, such as tokenomics. When a round of any project is in progress, instead of “Details” you will see “Invest” – this button will take you to the investor panel where you will make a purchase.
In the “Dashboard” you can also change networks and mark your favorite networks with a heart icon to put them at the top of the list. Simply click on the name of the current network to expand the list, you can then add networks to your favorites and they will appear at the top of the list. Right next to your wallet address, which is displayed in the top right corner of the list, there is information about the total amount of zkSNP Power points you have earned through staking. Next to your zkSNP Power points is the name of the level you are at and a logout button next to it. If you are interested in the results of the CertiK audit, click on the audit icon.
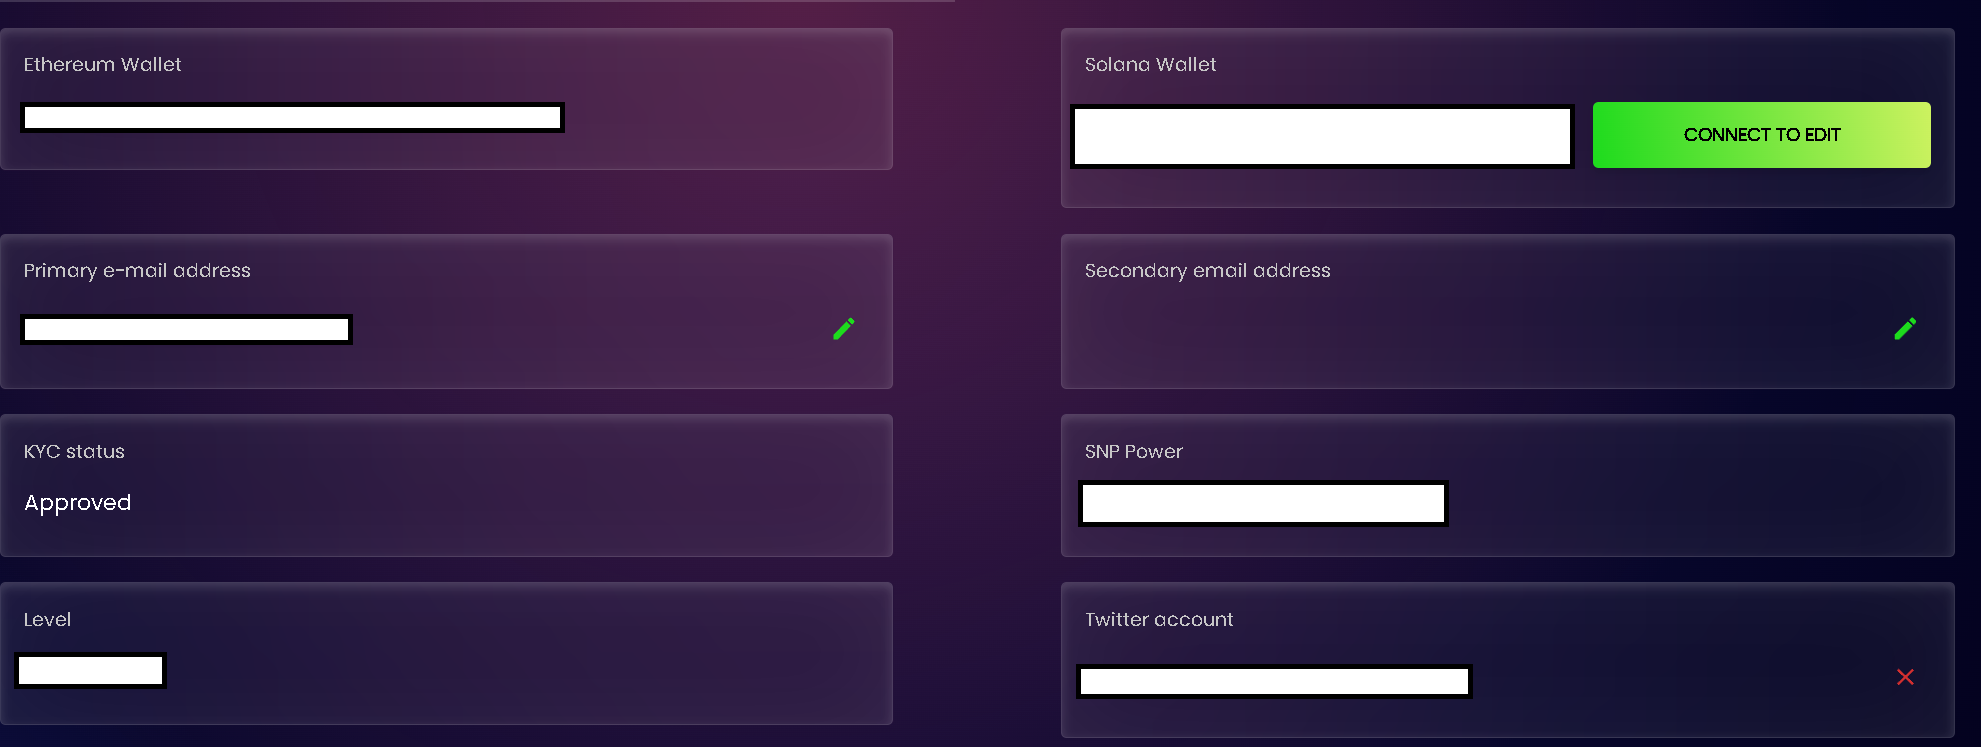
Profile
Here you can check your current email address or edit it by clicking on the pencil icon, you will also see your KYC status, the amount of zkSNP Power you have, the level you are at, the wallet address that is assigned to your account and the wallet address SOLANA, which you can also add there by clicking “Connect to edit”. We recommend using the wallet phantom.app. You can also add your Twitter/X account.
Staking
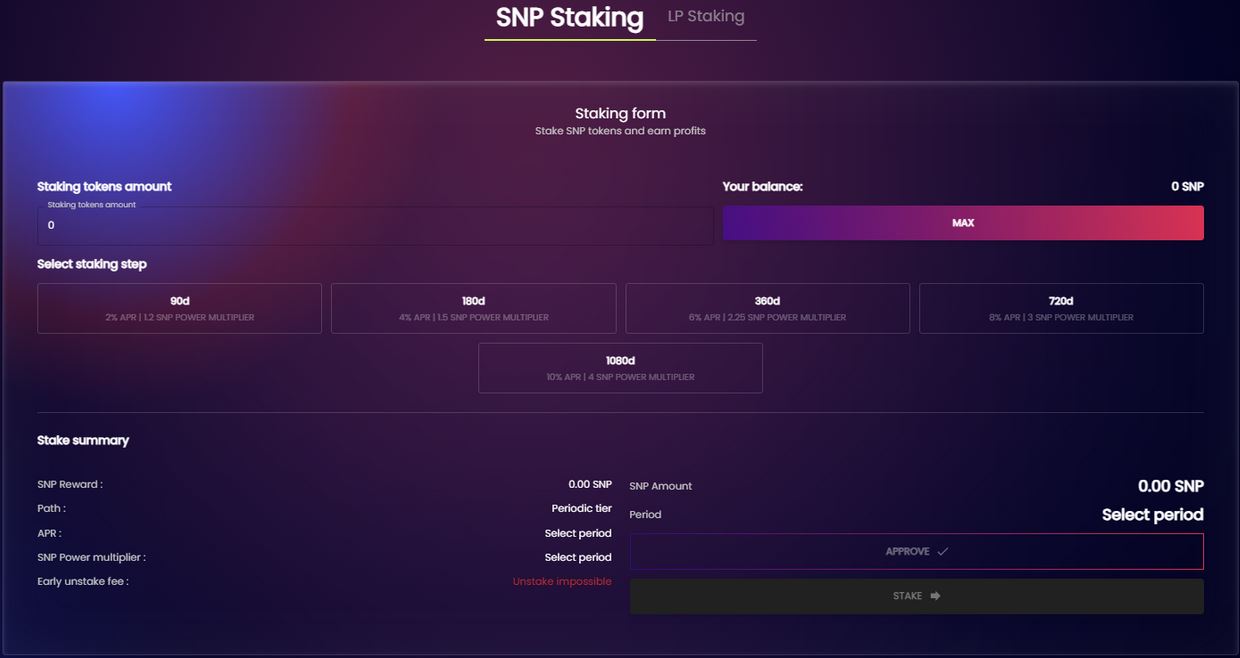
To stake zkSNP tokens, go to our platform using the link: Click, remember to log in if you already have an account. Then make sure your wallet is connected to the zkSync Era network.
The next step to stake tokens is to go to the “Staking” tab and then select “zkSNP Staking” or LP Staking, depending on the tokens you have.
Then we choose our preferred staking path, the conditions it offers and click approve. After confirming the transaction with the wallet, we click stake and confirm our willingness to stake the tokens again.
That’s all!
Providing liquidity and LP staking:
How to ensure liquidity and trade LP tokens?
After adding liquidity on Pancakeswap it is also possible to stake LP tokens on zkSync Era Mainnet network, as a DEX mentioned reward liquidity providers with their liquidity tokens, which reflect your liquidity pool. With these tokens in your wallet, you can stake them on our platform.
How to do it, read the guide below:
By using this guide, you take full responsibility for your resources and actions. Do not perform any activities other than those described in the guide – especially if you are doing it for the first time. By adding liquidity, you are aware of what “impermanent loss” is and you know its effects.
How to do it on PANCAKESWAP?
- Visit Pancakeswap https://pancakeswap.finance and connect with your wallet.
- Make sure you add zkSNP and USDT as a pair.
address zkSNP: 0x971b79ef5e76088af5e52c6d6aa3276c2190e45c
- Then enter your preferred amounts for zkSNP and USDT.
Press the “Approve” button. Your wallet will ask you to confirm.
The button will light up. Click on it. A window will appear telling you how much you will receive in return.
- Confirm that you want to make a wallet transaction. After waiting for a while, you will see your LP token balance at the bottom of the page. Now you can log in to the platform https://app.synapse.network/. After logging in, go to the staking section. Enter the number of LP tokens, select the period and start staking!
Address token LP: 0xdeb100acb78dd53834283421412973a9f35008aa
Legend:
Emergency Unstake: This is the ability to unstake the LP tokens, which can be done at any time; this action means that the user does not receive any rewards, even those that he earned previously. When performing an emergency unstake, an emergency fee is charged, which varies depending on the period selected by the user. Performing an emergency unstake is tantamount to ending staking. The emergency unstake fee increases with the staking period.
Emergency unstake withdrawal fee: This is a fee that is charged when an Emergency unstake is performed. The fee is deducted in LP tokens.
zkSNP Power Multiplier: The zkSNP token multiplier works the same as in the case of standard zkSNP staking.
Amount of LPs: The amount of staked LP tokens.
Staking period (lock): The duration of the staking, also known as the staking period.
Estimated rewards: Estimated zkSNP token rewards.
Number of zkSNPs: The sum of zkSNPs contained in LP tokens staked by the user.
APR: Annual interest rate.
How LP rewards are calculated:
When adding a stake, your tokens are analyzed by the contract to find out what amount of zkSNP corresponds to the amount of your LP at the time of adding LP tokens to staking. Rewards are calculated based on the calculated amount of zkSNPs and the interest rate.
What LP staking activities can a user do:
Unstake:
After the staking period has expired, the user can unstake immediately, without having to wait additional time to withdraw and without paying an additional fee.
For example, when staking LP tokens for a period of 30 days, rewards are accrued only for this period, please remember that if you leave tokens in the stake without unstaking after 30 days, you will not receive rewards for the additional period.
Restake:
Restake is possible after 75% of the staking time in the selected period.
Each staking period is characterized by a different time window in which you can restake the prizes. By clicking restake, we select a new staking period. The new staking period may be the same or longer than the current one.
Restake does two things:
First, it causes half of the rewards earned during staking to be exchanged for stablecoins. The stablecoins are then added to the LP liquidity pool along with the other half of the rewards. As a result, the created LP tokens go to the staking contract and not to the user. The new LP tokens created in this way are added to the currently staked LP tokens, creating a new staking. We calculate the new number of prizes in the same way as when adding a stake.
If the APR interest rate changes, the conditions you selected at the beginning of the period remain the same. The time window counting down to the possibility of making a restake may then change.
Claiming
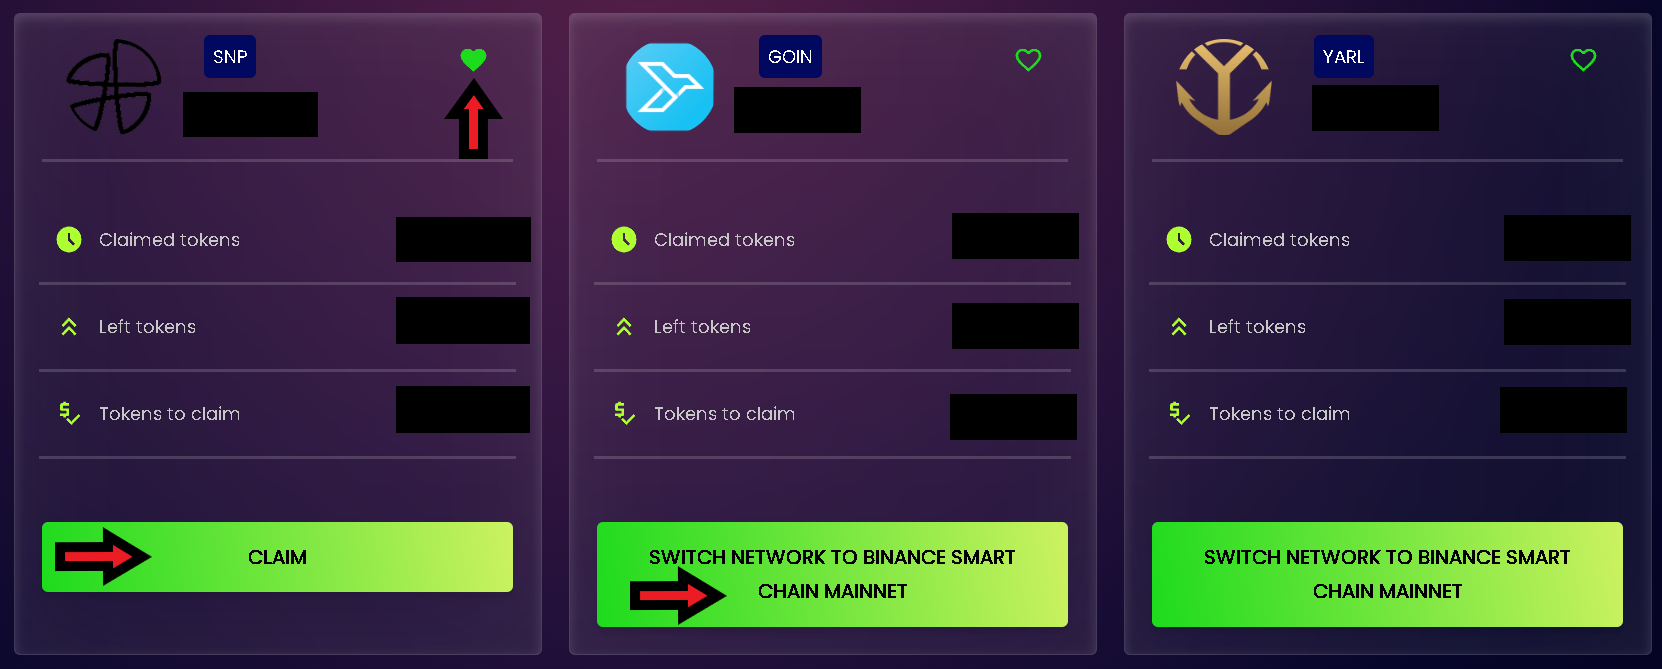
Here you will be able to collect your purchased tokens, if they are available. Please note that projects run on different networks, so sometimes you will need to switch to the correct network. In this tab you will find information about how many tokens you have already received, how many tokens you can collect now and how many tokens are left in the vesting contract. To make a claim, press the “claim” button and confirm it with your wallet.
Migration
Token migration, what you need to know?
You don’t have to do anything, all the tokens have been transferred to the new network for you.
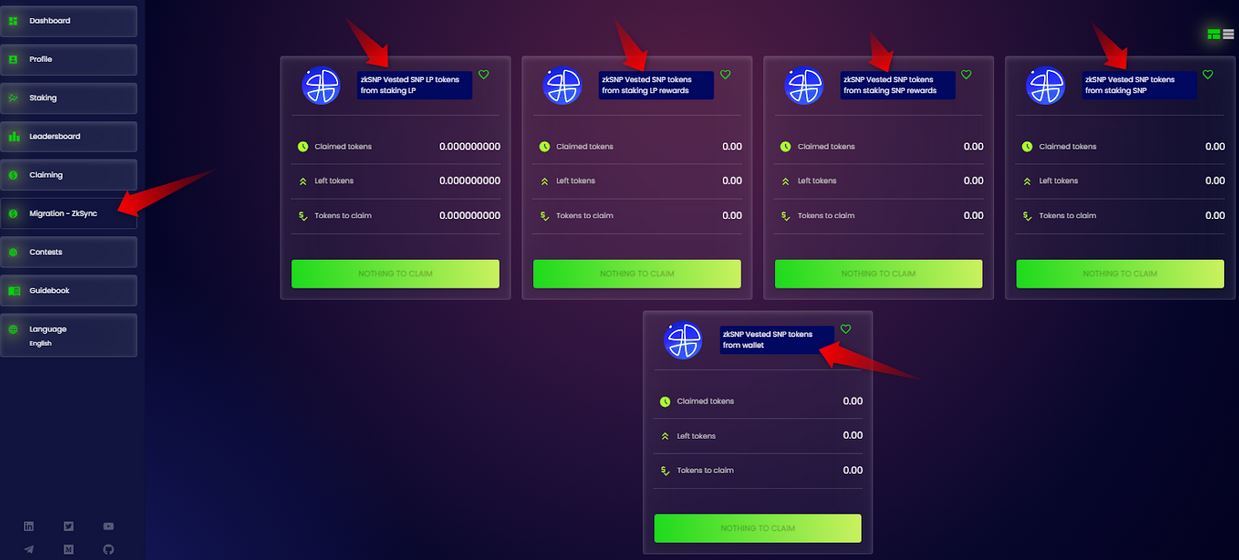
Tokens are available for collection on our dapp under Migration-zkSync. Of course, you will not claim them immediately as they are locked in vesting according to the migration rules.
Click here to access the migrated tokens section tab.
- The token claiming section consists of several parts:
Important: All tokens, regardless of their type and status, are released linearly, this means that you will not claim them all at once, you may claim a small amount every so often. We would also like to point out that the rewards for zkSNP and LP staking, will only start to release once the vesting of the primary tokens from the staking is complete. These rewards will continue to be released for 6 months.
- ”zkSync Vested SNP LP tokens from staking LP” – here are the base tokens from the LP staking (they will be released in the form of migrated LP tokens.
- ”zkSync Vested zkSNP LP tokens from staking LP rewards” – Here are the rewards that have accrued up to the time of migration for staking LP.
- ”zkSync Vested zkSNP tokens from staking zkSNP rewards” – Here are the rewards that have accrued up to the time of migration from all your stakings.
- ”zkSync Vested zkSNP tokens from staking zkSNP” – here are the base tokens from staking, more precisely from all paths and networks, summed up in one place.
- ”zkSync Vested zkSNP tokens from wallets” – here are the tokens you had on your wallet on all networks before the migration.
- The length of vesting depends on where the tokens were before migration:
– If tokens were on the wallet, they are vested for 90 days.
– If they were in staking, they are in vesting with a time equal to half of the staking remaining at the date of migration, but not less than 3 months.
– If in LP staking, then as above.
What about zkSNP Power and Tier? – Both are the same as you had at the time of the snapshot. On the other hand, if you start claiming tokens, then the number of zkSNP Power will drop.
If you are curious about other information regarding the zkSync network and the $zkSNP token:
– Read the article fully describing the migration process.
– Read the FAQ.
Before asking for details of the migration in the chat room:
– Take a moment, use a search option and find the answer!

Explanation of the tier system
Explanation of how the level system works, plus examples and simulations.
Tier System offers 10 levels:
To reach a certain level, you must stake zkSNPs and obtain a certain amount of zkSNP Power. You will also get the required amount thanks to the multipliers offered by our staking. Thanks to multipliers, even with a small number of zkSNPs you will achieve a higher zkSNP Power total. Reaching the appropriate Tier will allow you to take part in one of our rounds or lotteries. Additionally, each level offers a different pool multiplier that increases your allocation spot amount. You can check how this works in the example.
We encourage you to read the content carefully to better understand the entire system offered by Synapse Network.
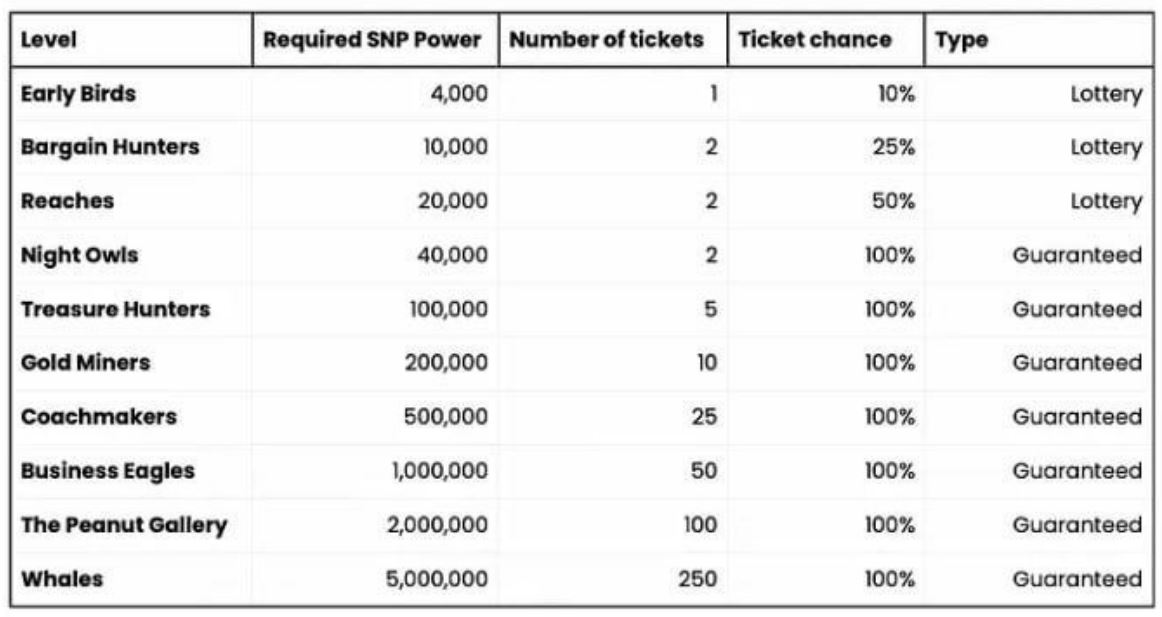
Level: Level and its name.
Amount: zkSNP Power amount – is equal to the sum of zkSNPs in staking including multipliers offered by staking in specific step in path (not to be confused with allocation multiplier) required to gain a Tier. The sum of the zkSNP Power you have is visible on the board at the top above the tier name, next to the wallet address.
Pool: Allocation multiplier. Multiplies the basic allocation calculated for the “Early Birds” tier, examples of how this works can be seen below. (Not to be confused with multipliers offered by staking paths)
Pool chance: Percentage of chances of winning the allocation lottery.
Type: Types of allocation, lottery or guaranteed allocation.
- B) Important:
By achieving 40k zkSNP Power you will receive a guaranteed allocation.
By achieving less than 40k zkSNP Power you will have a chance to win an allocation through the lottery.
The percentage chance of winning an allocation in the lottery differs for the Early Birds, Bargain Hunters and Reaches levels, with 10%, 25% and 50% chances of winning respectively.
How does the allocation multiplier work and how is the allocation distributed?
Let’s assume that, on average, 25% of zkSNP staker users have registered for a round.
The calculation is made after counting the registered people per round.
The amount to be raised in a given round is $50,000 and the base allocation has been calculated at $60.85 (basic allocation, this is the allocation from the Early Birds Tier)
Having a level Night Owls (40,000 zkSNP Power) the allocation multiplier is 2.
Your guaranteed allocation is therefore 2 x $60.85 = $121.70
Having a level Treasure Hunter (100,000 zkSNP Power) the multiplier is 5.
Your guaranteed allocation is therefore 5 x $60.85 = $304.25
We calculate the allocation in the same way for the other levels.
- A) The allocation is scaled linearly:
Assuming that 25% of the users will participate in the round, and the pool size of the round is $50,000 – the allocation will be $60.85 as in the example above.
However, when the pool of the round is $100,000 with 25% of users participating in the round, the allocation will be 2x more (because the pool is 2x bigger) than it is already $121.70 etc.
- B) Do the multipliers add up? No!
Each staking you do will multiply the zkSNP power in that pool separately. If you have several stakings, you do not add the multipliers to get their sum and multiply the zkSNP Power, each pool is counted separately which means you only add the zkSNP Power, not the multipliers.
zkSNP – Token details
Where to buy zkSNP tokens and where to track their price?
- To check the price chart: Click
Here you can buy zkSNP via the zkSync Era network: Click

KYC – How the process looks and how to pass it
KYC is a procedure for verifying a user’s identity that is required for regulatory reasons. After completing KYC, you will be able to fully use all the possibilities offered by our platform. Please note that to activate the KYC procedure on our platform, you must achieve a minimum of 4,000 zkSNP Power or its equivalent in LP.
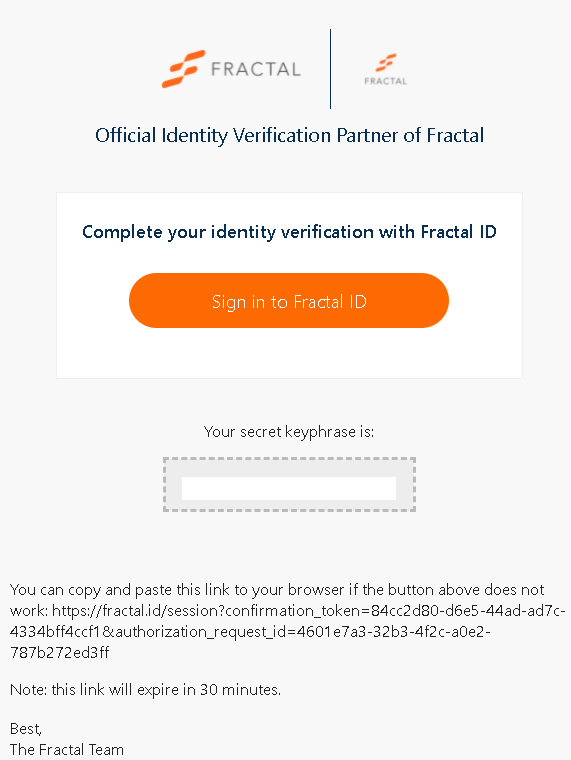
Step 1– Click the Login to Fractal ID button.
Step 2 – Read and accept the privacy policy and user agreement.

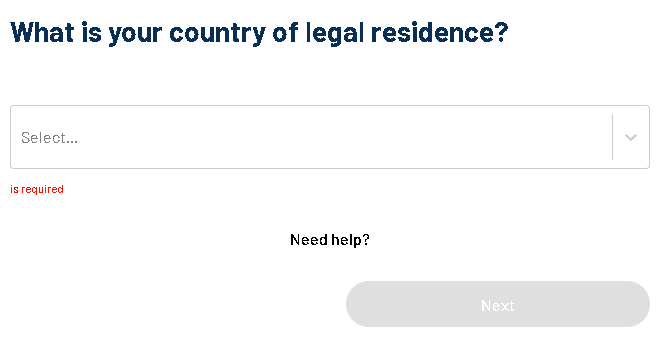
Step 3 – Select your country of residence.
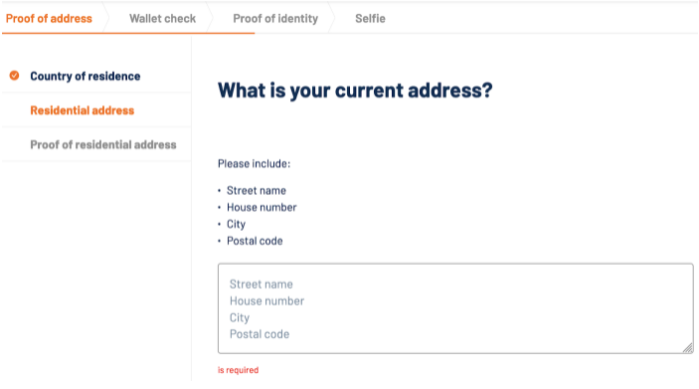
Step 4 – Please provide your current residential address. The data must be consistent with the documents that you will provide to Fractal in the next stage.
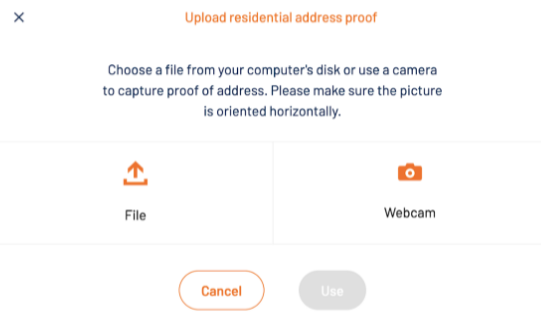
Step 5– You must send a document confirming your address, please read the message on the screen carefully.
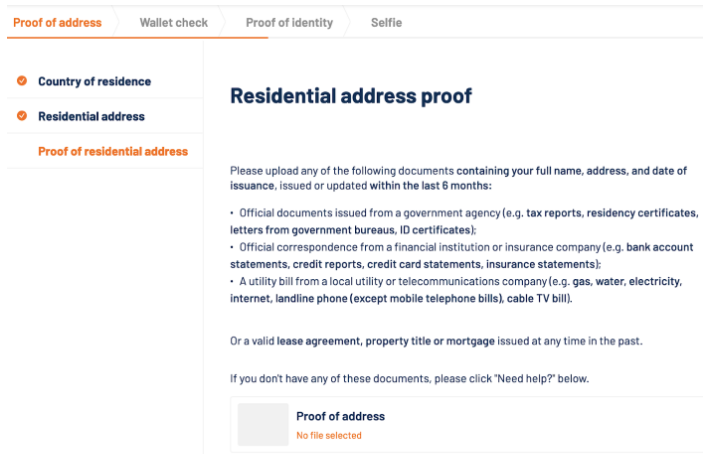
Select a file from your computer or use your camera to deliver your document to Fractal. Make sure the photo is horizontal not vertical.
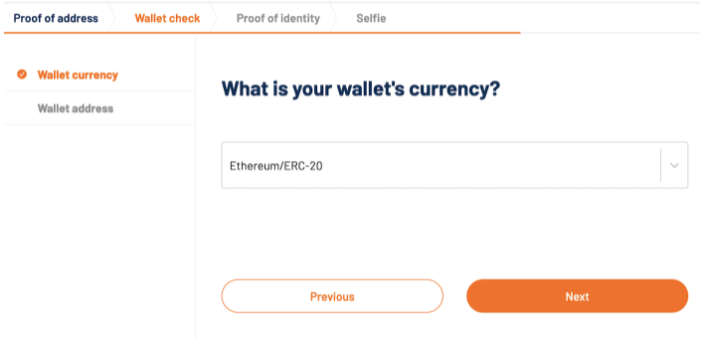
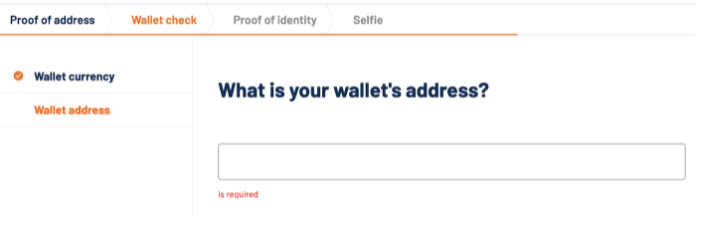
Step 6– Fractal.id needs to verify your wallet address. Please select ERC20 and then click next.
Now just paste your ERC20 wallet address. This address must be the same as the one you used to create your account on our platform.
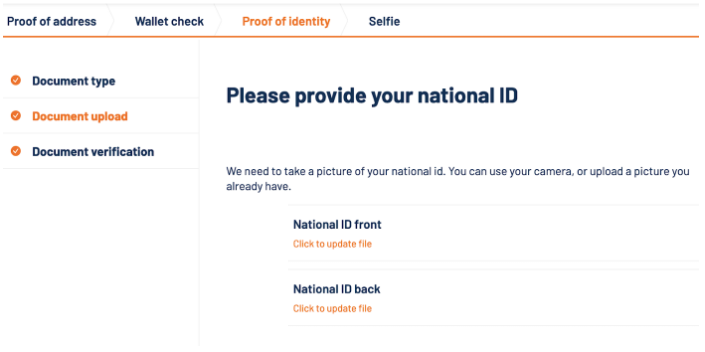
Step 7 – Select the type of ID you have. For example, an ID card.

Now just upload the required ID photos (front and back)
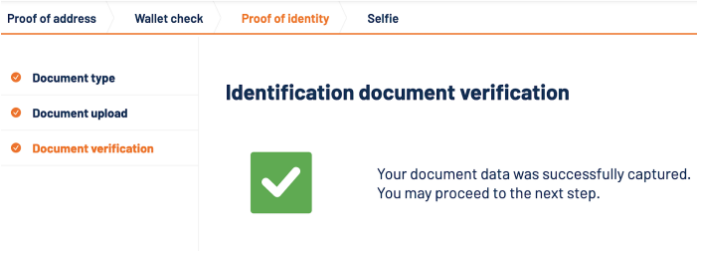
You will then have to wait a few minutes for your identity to be confirmed.
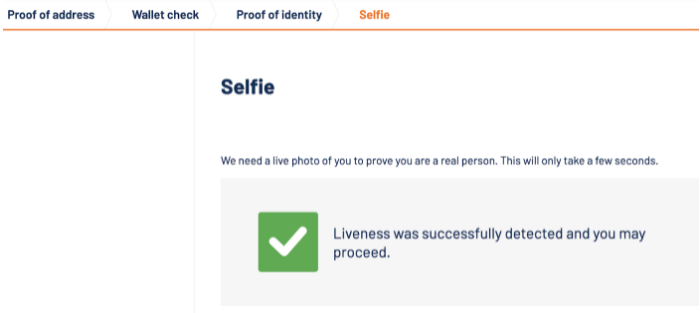
Step 8 – Live photo verification. Fractal.id needs your live camera image to confirm that you are a real person. It will only take a few seconds. You can complete this step using your mobile device.
Congratulations, that’s all. Please pay attention to your email address, where you will receive a summary of the KYC transition from Fractal or information if further actions are needed, e.g. if a document is not compliant. As soon as Fractal.id verifies all your details, you will be able to fully use our launchpad!

How to invest with the Synapse Network platform
Step-by-step guide on how to invest and FAQ.
- After registering an account and logging in to our platform: https://app.synapse.network/ you will need to achieve one of the Tiers, this can be done by staking zkSNP tokens in our advanced staking system. Once you have achieved at least 4000 zkSNP Power. You will be required to complete KYC identity verification. KYC verification is necessary, without it you will not be able to use our platform. Our partner Fractal.id is a best-in-class KYC solution provider with exceptional support that you can find on the website Fractal.id.
- You can only have one account on our platform, you can only use an ERC20/Ethereum address and no other when creating your account, and the preferred wallet that is required to connect to the platform is the Metamask wallet. All details used during KYC verification by Fractal.id must always be the same as on our platform, otherwise you will not be able to pass KYC verification. KYC verification usually takes up to 24 hours.
- It is important to note that in order to start the KYC process on our platform, you must have achieved at least the first level of our tier system. The leveling system is described in this article.
Also consider connecting your Solana wallet, this can be done in the My Account tab, you also need to add your Solana address as it gives you access to projects built on the Solana network, and secondly, it is to this address that the project will allocate your purchased tokens to you if they are on the Solana network. The wallet we suggest you use is Phantom.app.
First, we will discuss the conditions necessary to invest in projects on our platform, starting with what you need to have to participate in the sale.
- You must achieve at least the first level of our tier system by staking zkSNPs on our platform or by staking LP liquidity tokens (you can obtain these by providing liquidity on Pancakeswap). When it comes to zkSNP Power calculation, staking from all stakings are added up.
Please note that by reaching the first level (4000 zkSNP Power), you qualify for our lottery for a chance to win a guaranteed allocation. However, after reaching the level of 40k zkSNP Power all rounds are guaranteed for you.
- The amount of the allocation depends on the total pool to be collected in a given round of the project and on how many people want to participate in it. To increase your allocation, add more zkSNP tokens to your staking or LP and work towards higher Tiers, our staking paths also offer zkSNP Power multipliers and allocation multipliers that depend on your Tier level. The minimum allocation varies depending on the project and is approximately USD 0.3-13.
- Once your details have been approved by Fractal (KYC), your wallet has been connected and you have reached our “Early Birds” tier system through staking (minimum 4000 zkSNP Power), you need to take another very important step, namely to participate in the token sale selected project, you must express your willingness to participate before the deadline, which you can easily check in several places:
- A) Go on: https://synapsenetwork.medium.com/ and get to know the round schedule.
- B) On our platform in the projects tab: https://app.synapse.network/
- C) By entering //time on our telegram channel: https://t.me/Synapse_official
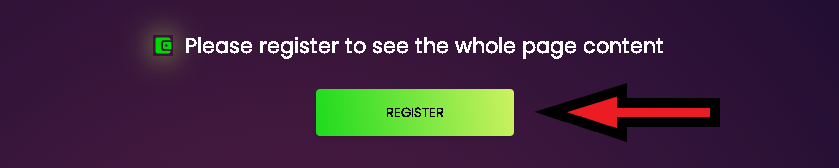
After making sure that registration is available, click on your preferred project on our platform and then click on the registration button visible on the screen. Once you click, you will see a thank you message indicating that you have successfully registered for the project round.
Remember that when you win an allocation in the GLEAM competition, you do not have to stake any zkSNPs. The only requirement in such a situation is to complete the KYC process before the end of the current round.
Now that you have met all the conditions, we will move on to how and for what to buy tokens of the selected project.
- First, you must have stablecoins in the wallet that you will use to purchase, this must be the wallet that you used to create an account on our platform. You can use: USDC, USDT, FUSD. As you probably know, stablecoins are cryptocurrencies that correspond to the dollar on a scale of 1:1. Every cryptocurrency is built on some kind of network. Select one of the available networks ETH/ERC20, BSC, Polygon (Matic), Avalanche, xDAI, KCC Fantom, OEC, Arbitrum, Harmony, Moonriver, Cronos, IoTeX, Optimism.
- Make sure that you have the same network selected on your Metamask wallet as on our platform. You will also need some native cryptocurrency to pay the fee when making the transaction. What is native cryptocurrency? Example: You want to buy project “A” tokens for USDT stablecoins via the Ethereum network, i.e. ERC20. What do you think the native token of this network will be? Yes, it will be Ethereum. Similarly, on the Avalanche network it will be Avax, on BSC it will be BNB, etc.
- If you want to add a network, go to https://chainlist.org/, then search for your preferred network, connect your wallet and confirm that you want to add a new network. Once you have made your selection, go to the project you registered for and click the invest button, select your network and stablecoin, and then follow the on-screen instructions. You will need to read and accept the SAFT and enter your chosen amount. Always enter full amounts, no numbers after the decimal point. You can also make an overpayment or so-called overallocation, which is a maximum of five times the guaranteed allocation that our platform will calculate for the first tier of the “Early Birds” system.
- Please note that an overpayment does not guarantee the purchase of additional tokens – whether you buy them depends on whether there are any tokens left at the end of the round. Any unused funds will be refunded to you via the BSC network according to the round schedule, refund usually made within 24 hours of the end of the sales round. Finally, read the information on the screen carefully, confirm your selected amount and complete the process.

FCFS – What it is and how does it work
(FCFS – First come, first served)
If you do not win the lottery, did not have time to buy the project, did not sign up for the round at the designated time or only now decided to purchase – you can still buy the project through the FCFS round, but only if the guaranteed pool is not sold out. FCFS is visible from the start of the basic round, i.e. for guaranteed allocations, and at the same time, a sales progress bar is displayed, which informs about how the sale is progressing.
- A) What about the allocation in the FCFS round?
The allocation during the FCFS round is a maximum of ten times the minimum allocation from the guaranteed sale.
- B) What about overpayment/overallocation in the FCFS round
A user participating in FCFS cannot make an overpayment/overallocation.
A user who has won GLEAM cannot make an overpayment either.
- C) What about KYC during the FCFS round?
If a person without KYC and without staking zkSNP tokens makes a purchase during FCFS, he or she must undergo KYC on our platform in order to receive tokens. These people will be able to complete the KYC procedure no later than 9 AM UTC on the day following completion of FCFS. The end of the FCFS round will occur automatically when the pool or o is filled 9PM UTC same day.

NFT/INO – details and rules of sale
What to do to participate in the NFT/INO round?
- Get your first Tier (Early Birds) or get the equivalent of 4000 zkSNP Power by staking $zkSNP tokens. NFT/INO rounds do not require registration for the sales round. All stakers who have at least 1 Tier (Early Birds) per round are registered automatically, no other action is required.
- If you do not have 4000 zkSNP Power and do not have the first Tier (Early Birds), the only way to have a chance to purchase an NFT is to complete Gleam and be on the Gleam winners list in a later drawing. The person who won Gleam is entitled to purchase one NFT, this number may change depending on the arrangements for sales rounds.
* It is mandatory for a user who participates in Gleam to complete KYC. We suggest that you start KYC immediately after the announcement of the draw results.
Description of the course and operation of sales
During the sale, users do not buy NFT tokens, only tickets, which are converted in a 1:1 ratio to NFTs, which means that a user who bought 10 tickets and then won in the draw will buy 10 NFTs. Tickets purchased by a user are multiplied by the Tier Level of that user, in this way we calculate the number of so-called ticket power, which increases the user’s chance of winning in the draw.
- The number of tickets purchased increases the chance of winning in the draw.
- Purchasing tickets does not guarantee the purchase of an NFT.
- We offer 10 Tier levels. Early Birds is the first of them, the higher your Tier, the more your chance of winning the draw increases.
An hour before the start of the sale, we take a snapshot of the Tier levels currently held by users, this status is taken into account in the sale. The higher the Tier level a user has, the greater his chance of winning.
Examples:
After purchasing 1 ticket and having Tier 10 (Whales) at the same time, the user will have 10 power tickets (1 ticket x Tier 10), which increase the user’s chance of purchasing one NFT, because 1 ticket is converted 1:1 to an NFT.
After purchasing 5 tickets and having Tier 10 at the same time, the user will have 50 power tickets (5 tickets x Tier 10), which increase the user’s chance of purchasing five NFTs.
After purchasing 5 tickets and having Tier 9 (The Peanut Gallery), the user will have 45 power tickets (5 tickets x Tier 9), which increases the user’s chance of purchasing five NFTs.
After purchasing 10 tickets and having 1 Tier (Early Birds), the user will have 10 power tickets (10 tickets x 1 Tier), which increase the user’s chance of purchasing a maximum of 10 NFTs.
Important:
* If more tickets are sold than the available NFT pool, the final winnings will be drawn. If this does not happen, the number of tickets will be converted by default, i.e. 1 ticket – 1 NFT.
*The maximum NFT purchase limit per user is 10, unless the rules of the ongoing round state otherwise.
* Overpayments cannot be made during the round, but each user can purchase up to 10 tickets.
* FCFS is not planned, but is not excluded in the future.
* After the end of the sale, people who purchased tickets but did not win in the draw will receive a refund of their invested funds within 24 hours from the end of the round, using the BSC network.
An example of a round:
🔸10.04.2024 — Details announcement (Medium)
🔸11.04.2024 9 AM UTC — Whitelist start (mandatory for non-zkSNP stakers) – Gleam
🔸11.04.2024 9 AM UTC — zkSNP stakers can start to register their interest in the guaranteed allocation
🔸15.04.2024 9 AM UTC — End of time for Whitelist and for interest registration
🔸15.04.2024 7 PM UTC — Whitelist Announcement, publication of allocation size, KYC for Whitelisted start
🔸17.04.2024 9 AM UTC — Sale Start
🔸18.04.2024 9 AM UTC — Sale End
🔸18.04.2024 10:30 AM UTC — FCFS Sale for zkSNP stakers
🔸18.04.2024 11:30 AM UTC — FCFS Sale for everyone (KYC after the sale)
🔸19.04.2024 10:30 AM UTC — FCFS Sale ending
🔸20.04.2024 9 AM UTC — Return of overallocated unused funds
